Please read through all of the instructions listed below, before submitting your 3D print.
Have you read through all of the instructions, or have you printed with Maker Commons before?
This tutorial will take you through the process of preparing a 3D model to print using 3DprinterOS. The software has a lot of options available so we’ve simplified everything down and created some templates for you to work with. This tutorial will be using those settings rather than the more advanced options within the software. These settings are best for basic printing, however if you need access to more advanced settings, contact the Maker Commons and we can assist you with accessing those options.
To start, you will need to log in to 3DprinterOS.com.
- Go to the Maker Commons submission page. (Alternatively, you can go to the 3DPrinterOS homepage and sign in there if you’d prefer).
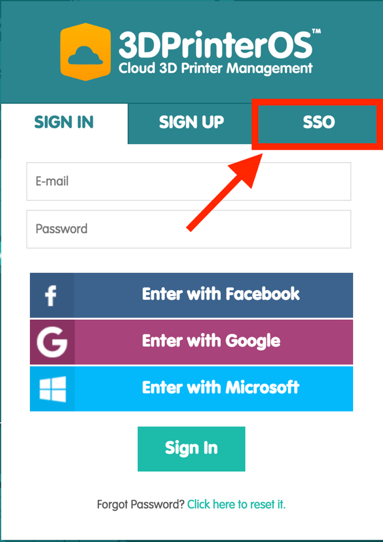
- Select the option for single sign on which will be marked SSO.
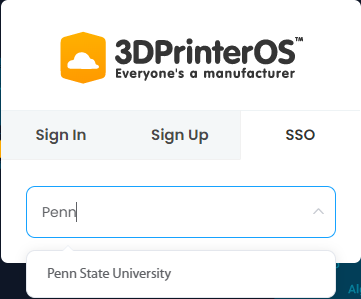
- On the SSO tab, search or scroll to Penn State University and click on the button.
- This will then take you to the familiar Penn State sign in screen. Log in to be taken to your 3DPrinterOS account.
NOTE: If you are printing for a designated class assignment and have a class code, follow the directions for printing with a class code before proceeding.
You will see the Files page by default when you first log in. If you navigate elsewhere, return to this page by clicking Files at the top of the page. You may need to click the Projects button to see your previously uploaded files.
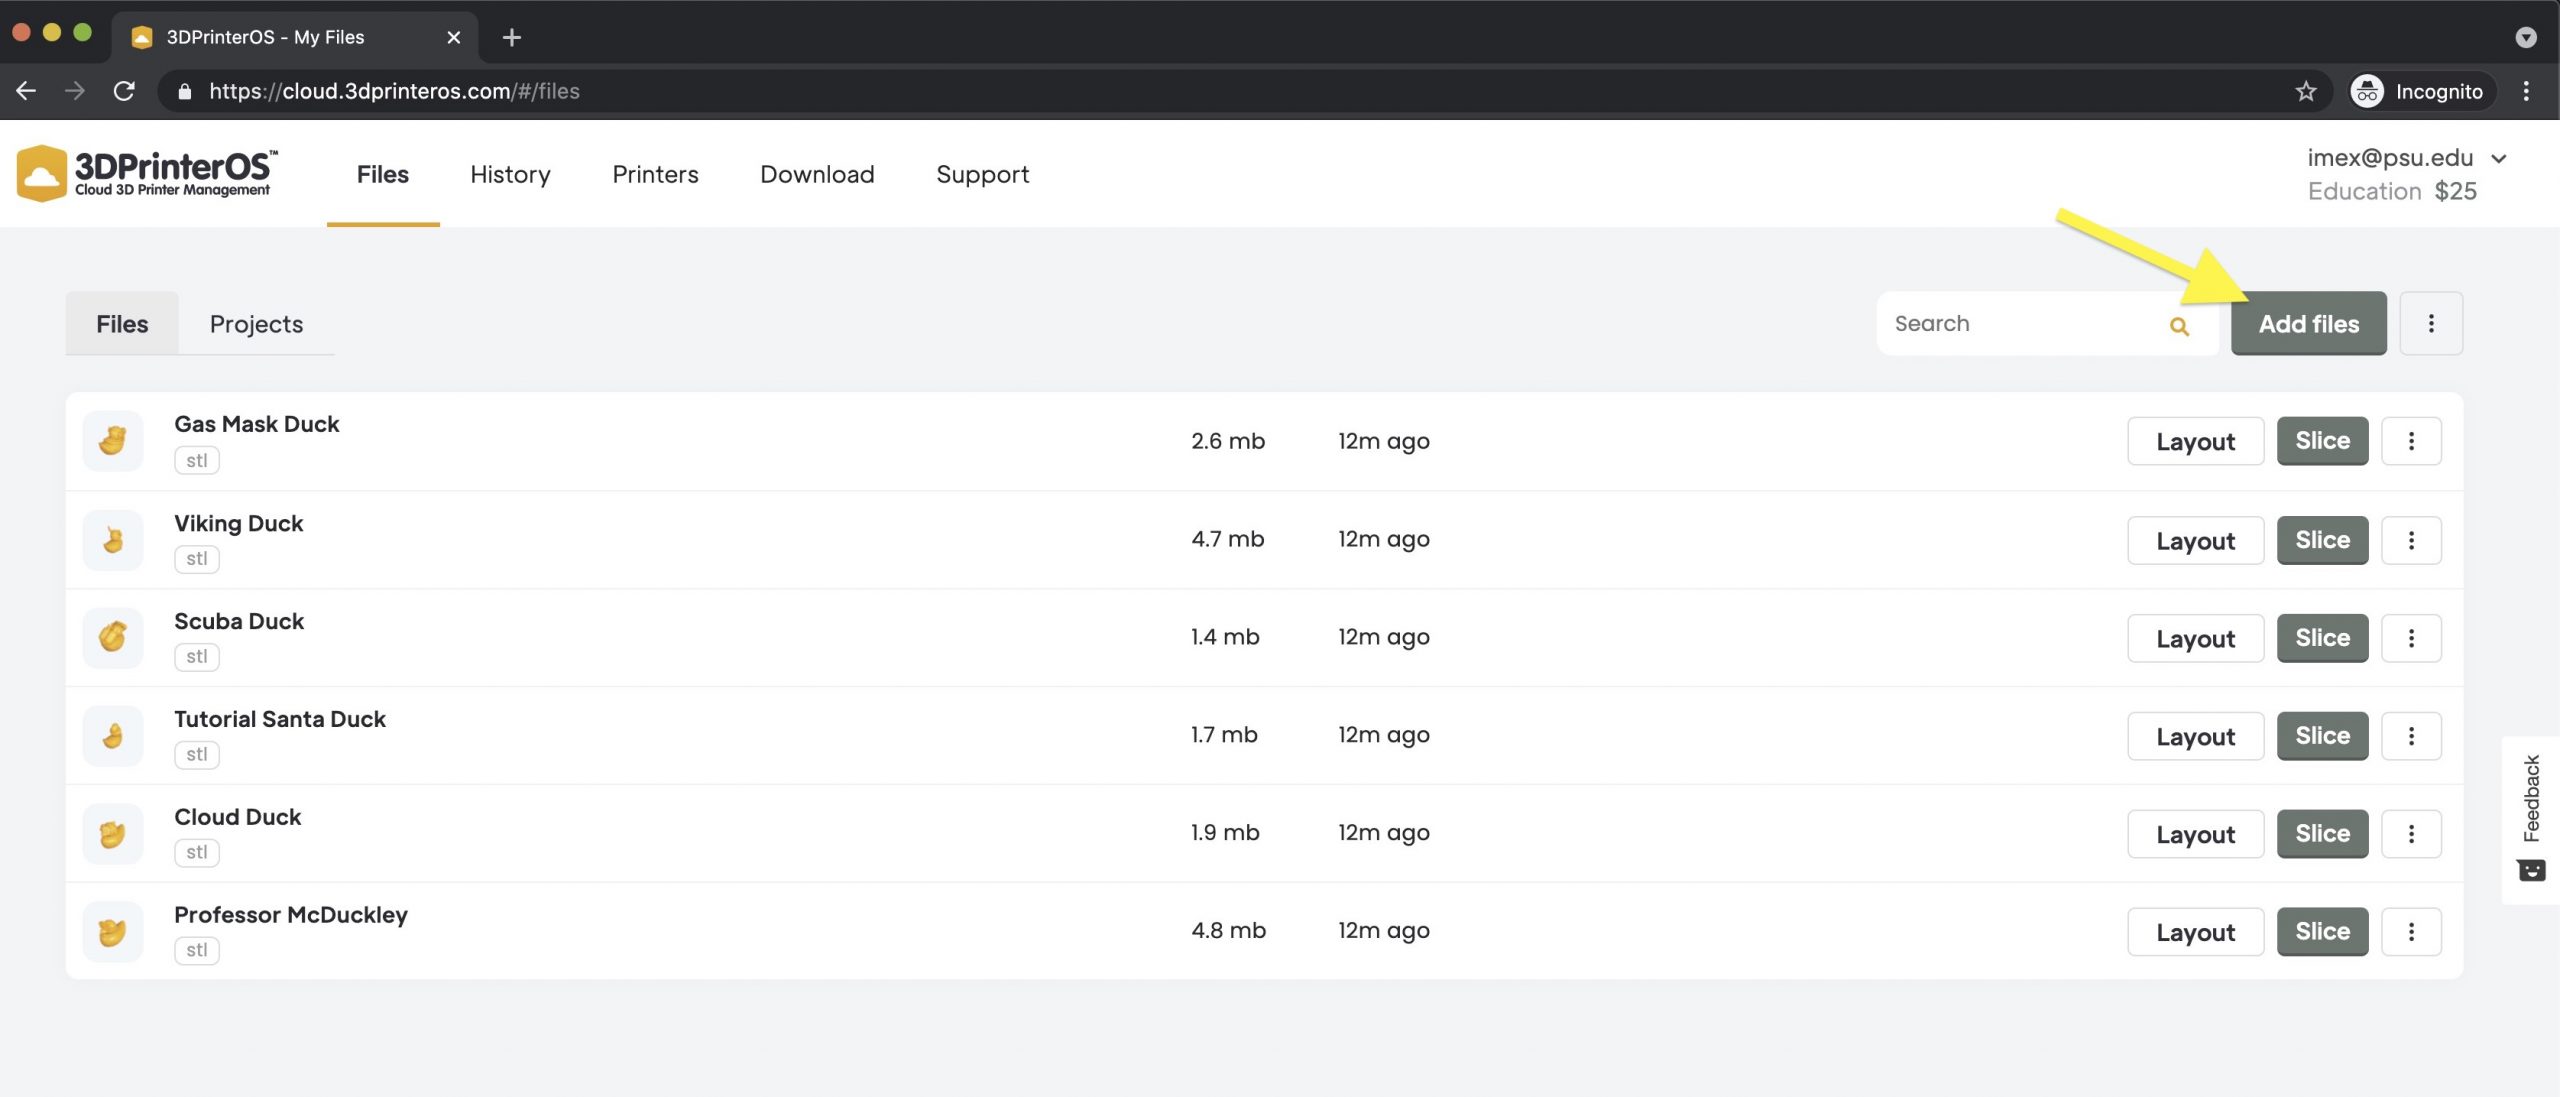
You will notice that you will have several demo models already loaded into your account. These are examples 3DPrinterOS adds to your account when you sign up. You can always delete these files at a later time if you’d like.
- To add your own file, go up to the top right hand corner of the screen and click the Add Files button.
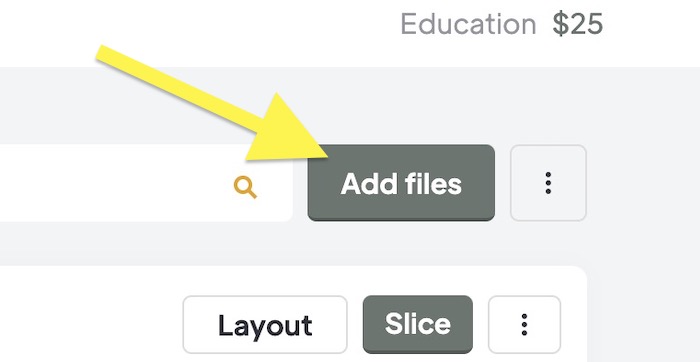
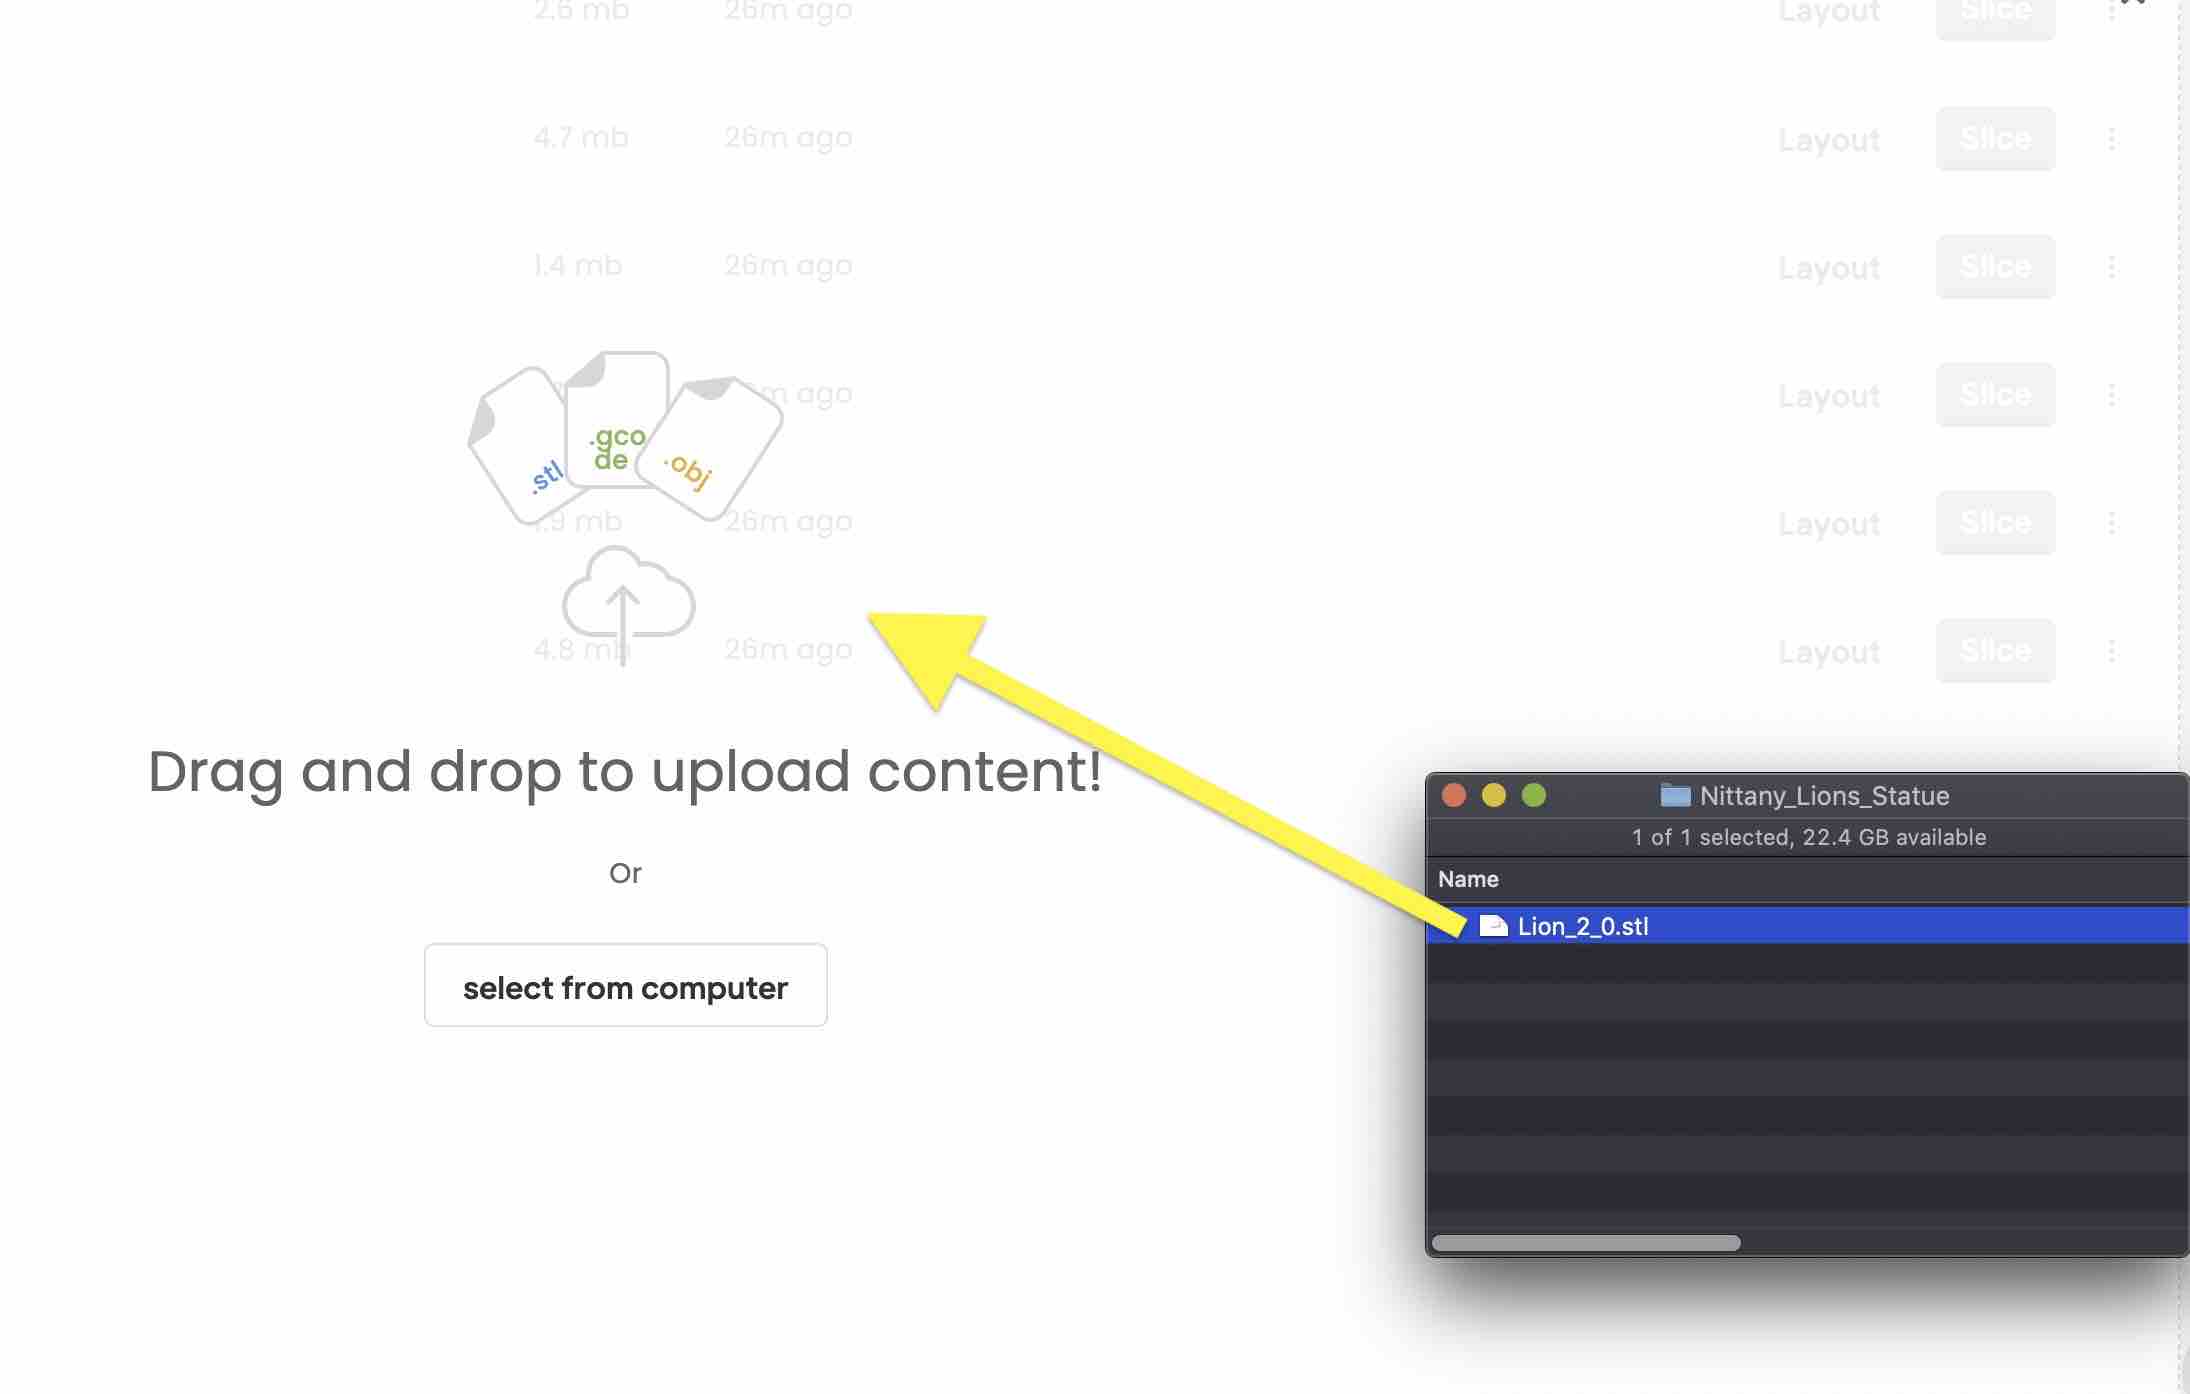
A window will pop up allowing you to select your .stl file.
- Drag and drop the file into the gray box, or click the select from computer button that appears in the middle of the screen.
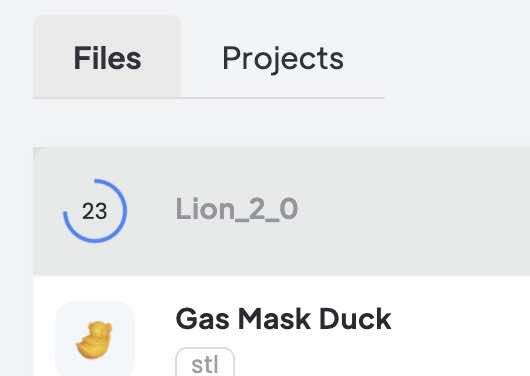
While your .stl file uploads, a progress indicator will appear on the left side of the page.
Now your file will appear in the list with the other examples files.
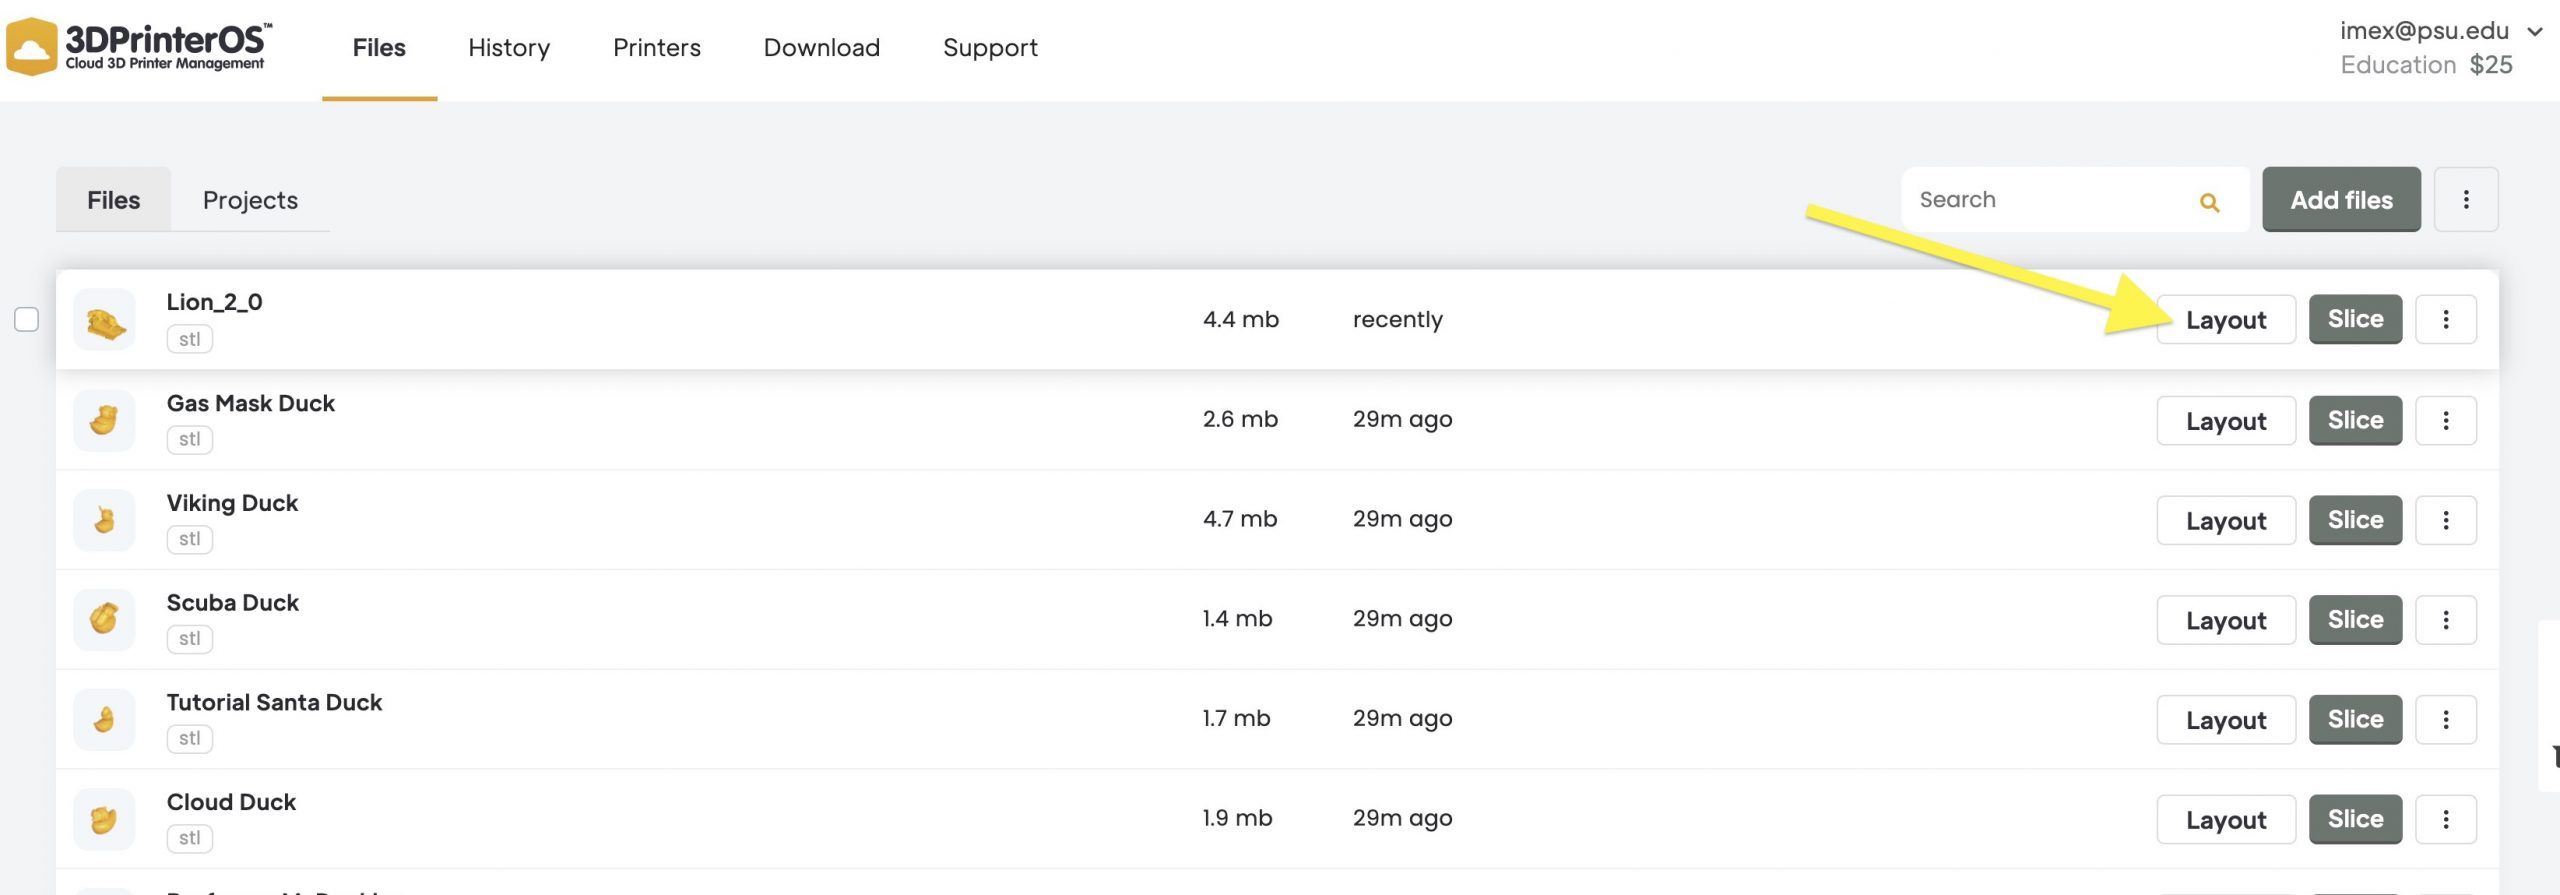
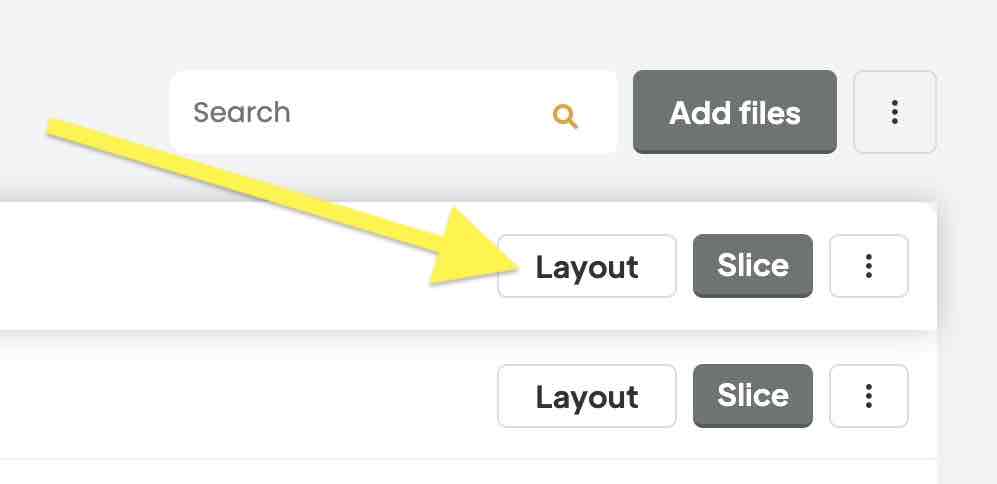
Now you will need to prepare the .stl file for printing. On the right hand side of the file listing, you will see two different actions that you can take. They are Layout, and Slice. Before slicing your .stl, you need to adjust how it is positioned on the build platform.
- Select the Layout action.
This opens a new window that lets you adjust how your model sits on the build plate of the printer. You also have options to Move, Scale, or Rotate the object if you need to change how the object is oriented in order to minimize supports that are added during the the slicing process. You can also click Add File to bring additional objects onto the platform. This is helpful when you have multiple small parts as it helps to keep them organized and helps to optimize printer efficency.

While you can choose to use or not use most of the tools in this window, there are two that must be checked before you slice the print. They are the On Bed and Center tools that you will see on the right hand side of the window.
- Click the On Bed button.
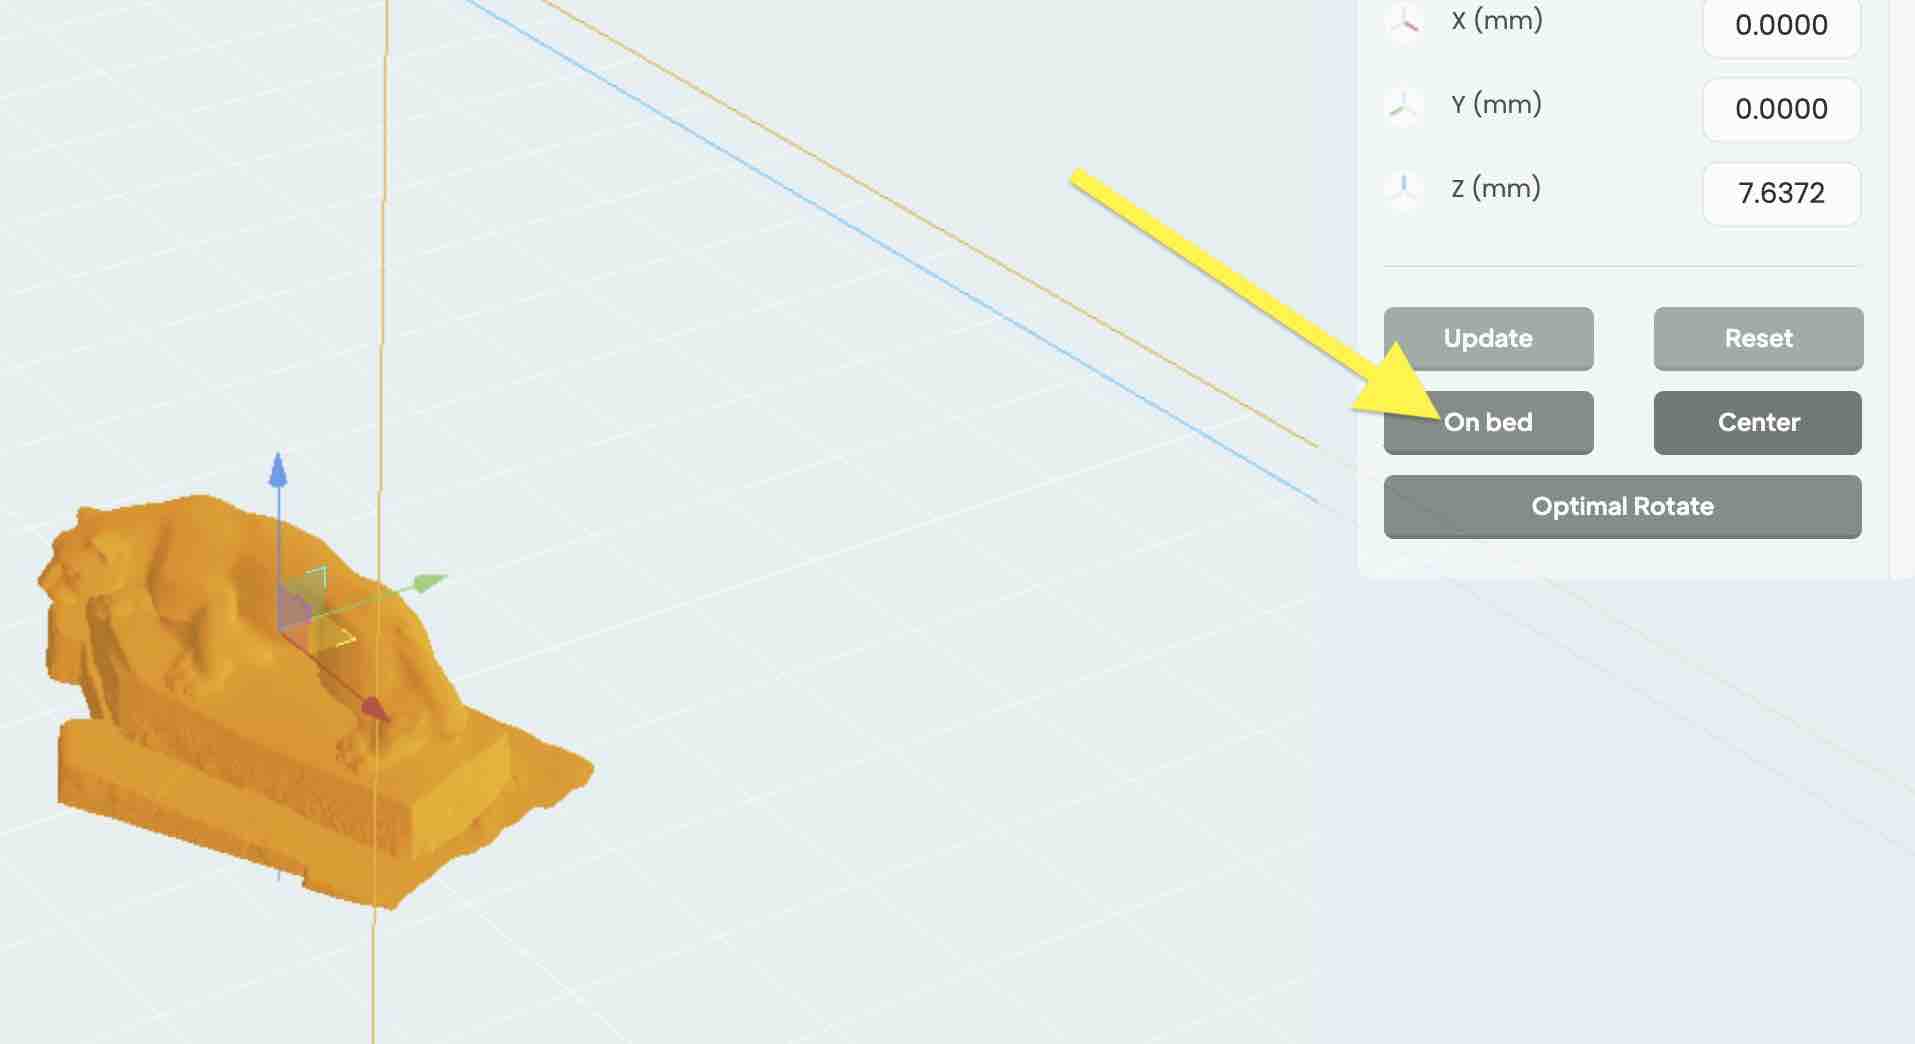
- Click the Center button.
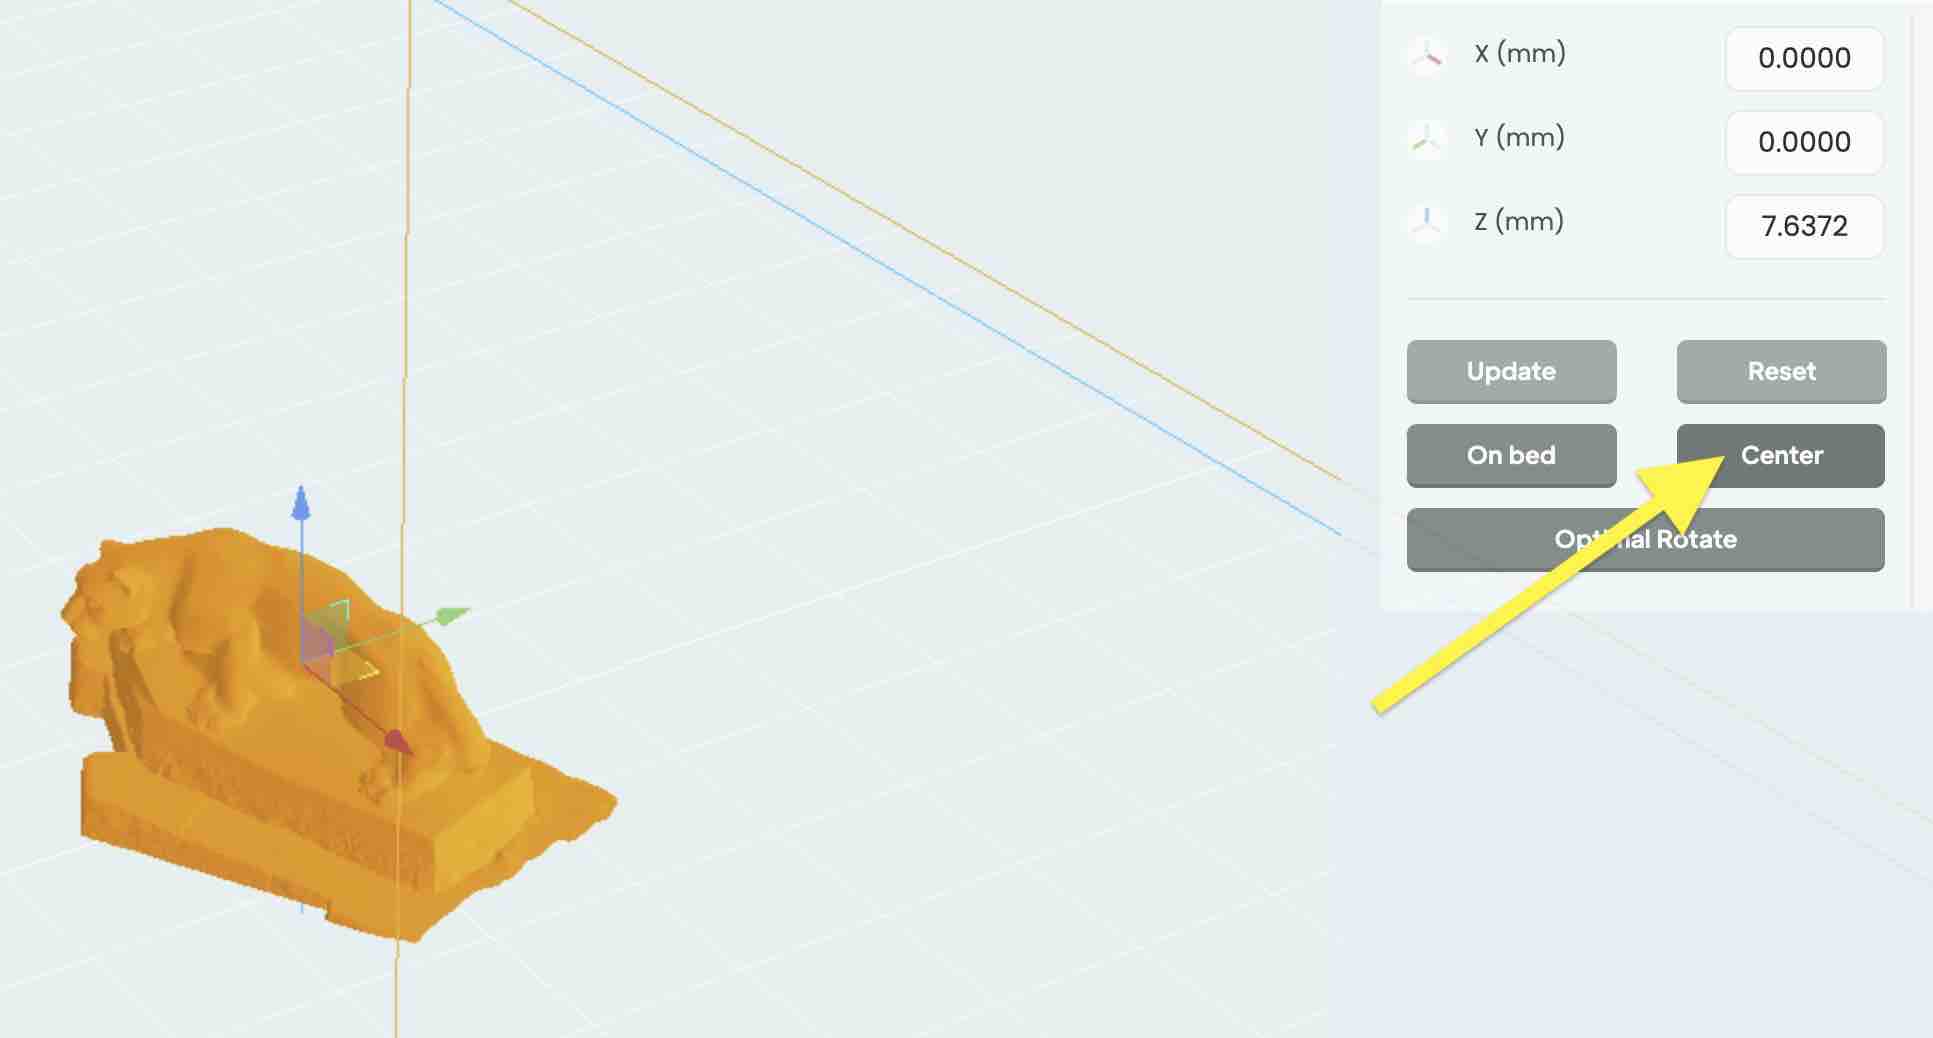
This will bring your model to the center of the build plate which helps to reduce the possibility of print warping that can occur if the object is out near the edges of the platform.
10. If you have multiple objects on the platform, use the move tool to adjust them so they don’t overlap or touch.
11. Once you have made sure that your object or objects have been positioned, click the Save button at the top middle of the window.

This saves a copy of your .stl file that is renamed with a string of numbers to differentiate it from your original .stl. Any changes to position, scale, or rotation are now reflected in this new file.

12. Press the Slice button on this new numbered .stl to convert it into .gcode for the Prusa MK4S.
If you have previously used 3DprinterOS before Fall 2024, any .gcode files you created were optimized for our previous Dremel printers and will need to be resliced for Prusa MK4S.
The three settings that can be changed are Layer thickness(mm), Perimeters, and Infill Density (%). To make things easier, we have loaded a Default (PLA) slicing profile based on print settings that Maker Commons has found to be a good balance between print speed and efficient filament usage. If you’d like to change these settings, it is better to do so on a second version, or iteration, of your print so you can compare how the settings have changed your object.

13. Click the Slice & Toolpath Preview button in the bottom right of the window.

This will convert your .stl file to a .gcode print file optimized for our Prusa MK4 printers, and bring up a preview window that lets you see how your model will print and also lets you see how supports (in pink) have been added to your model. It also estimates how many grams of filament your 3D print will use and the approximate print time.

14. When you are finished looking at the preview, hit the Close (X) button in the top right of the window.
3DPrinterOS now switches over to the Projects folder page of your account. Here you will see three files associated with your model. One is your original .stl model, the second is your original model but with the layout changes that have been made. It has the same name as your model with an additional numerical string added to the name. The third file is the .gcode (Prusa_MK4S) file. This is the file that you submit for actual 3D printing.

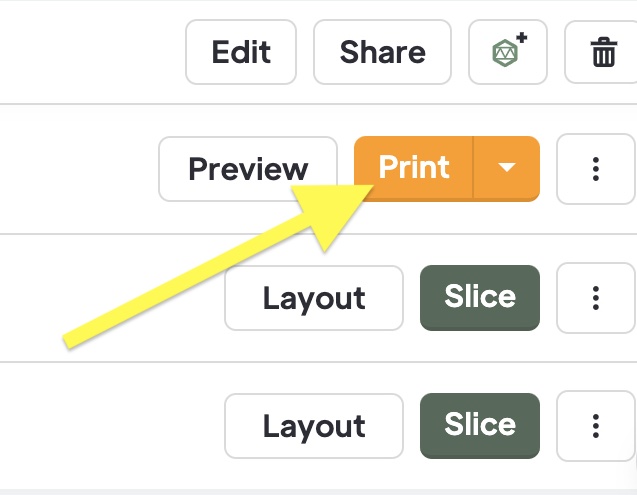
On the right side of this file, you have two different actions that you can choose. They are Preview and Print. Clicking Preview returns to the previous window, where you saw the simulation of how your model will print and the filament estimate.
15. To submit your model for 3D printing click the Print button.
16. Select a print Queue for submitting your model.
.
NOTE: If you do not see a queue listed, be sure to enter the class code provided by your instructor or sign up for personal printing and follow these directions for adding the queue.
For personal Prints, select the Personal Submission Request Queue by clicking the radio button on the right hand side of the print queue and then press the Queue button at the bottom of the window.
If your model is for a class project that has been pre-registered with Maker Commons by your instructor , please select the Class Submission Request Queue radio button and then press the Queue button at the bottom of the window.

- Once you’ve selected a printer, the last step is to fill out the print delivery label form.
Your Penn State Email Address, First Name, Last Name, Delivery Campus and Delivery Method need to be filled out correctly. If this information is incorrect, your 3d print delivery may be delayed. The Delivery Campus location sets the Campus Library that your print will be delivered to. If you are choosing World Campus, this option is currently only available to mailing addresses in North America. It is also not available for University Park or State College addresses. You will also need to select the Delivery Method to be World Campus or it will not be delivered. If you have any questions, please contact us.

- When you are finished and have verified your delivery information, click the Continue with Queue button.
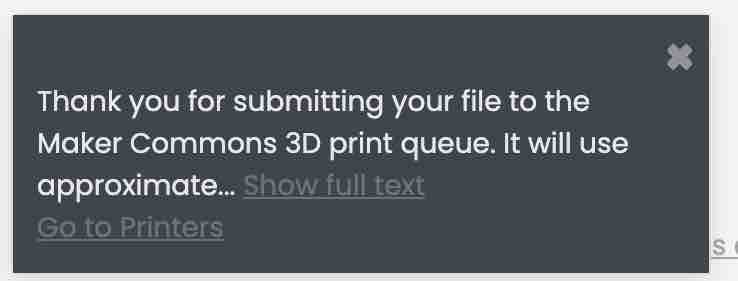
A notice appears in the bottom left of the screen letting you know that you’ve successfully submitted a print.
Now that you have submitted a 3D print, your filament credits will be debited at $0.10 per gram of filament. You can always see your balance by looking at top right hand corner of the 3DPrinterOS website. If you are running low on filament credits, more can be requested at: https://makercommons.psu.edu/3d-printing-information-1/request-additional-3d-printing-credits/

All Ready to Get Printing?
Click the button below to submit your 3D print to the Maker Commons, using the instructions above.
